
Since my top knot has become known somewhat as my “signature” (but mostly just a reflection of my lazy girl ways), I thought it high time to put together a step-by-step how-to! My method for creating my crowning glory is somewhat unusual, so read on for the full perfect top knot tutorial!
 Supplies you’ll need:
- Texturizing spray (I’ve been loving this one recently)
- Two thick elastics
- Bobby pins (useful if you have shorter layers that slide out)

1. Start with day old (at least) hair. Spritz with a little texturizing spray and tousle with your fingers.

2. Gather your hair up into a high ponytail, and wrap the elastic securely. Pull your hair tight, and then gently loosen underneath your ponytail and the front slightly (so the hair isn’t plastered to your head).
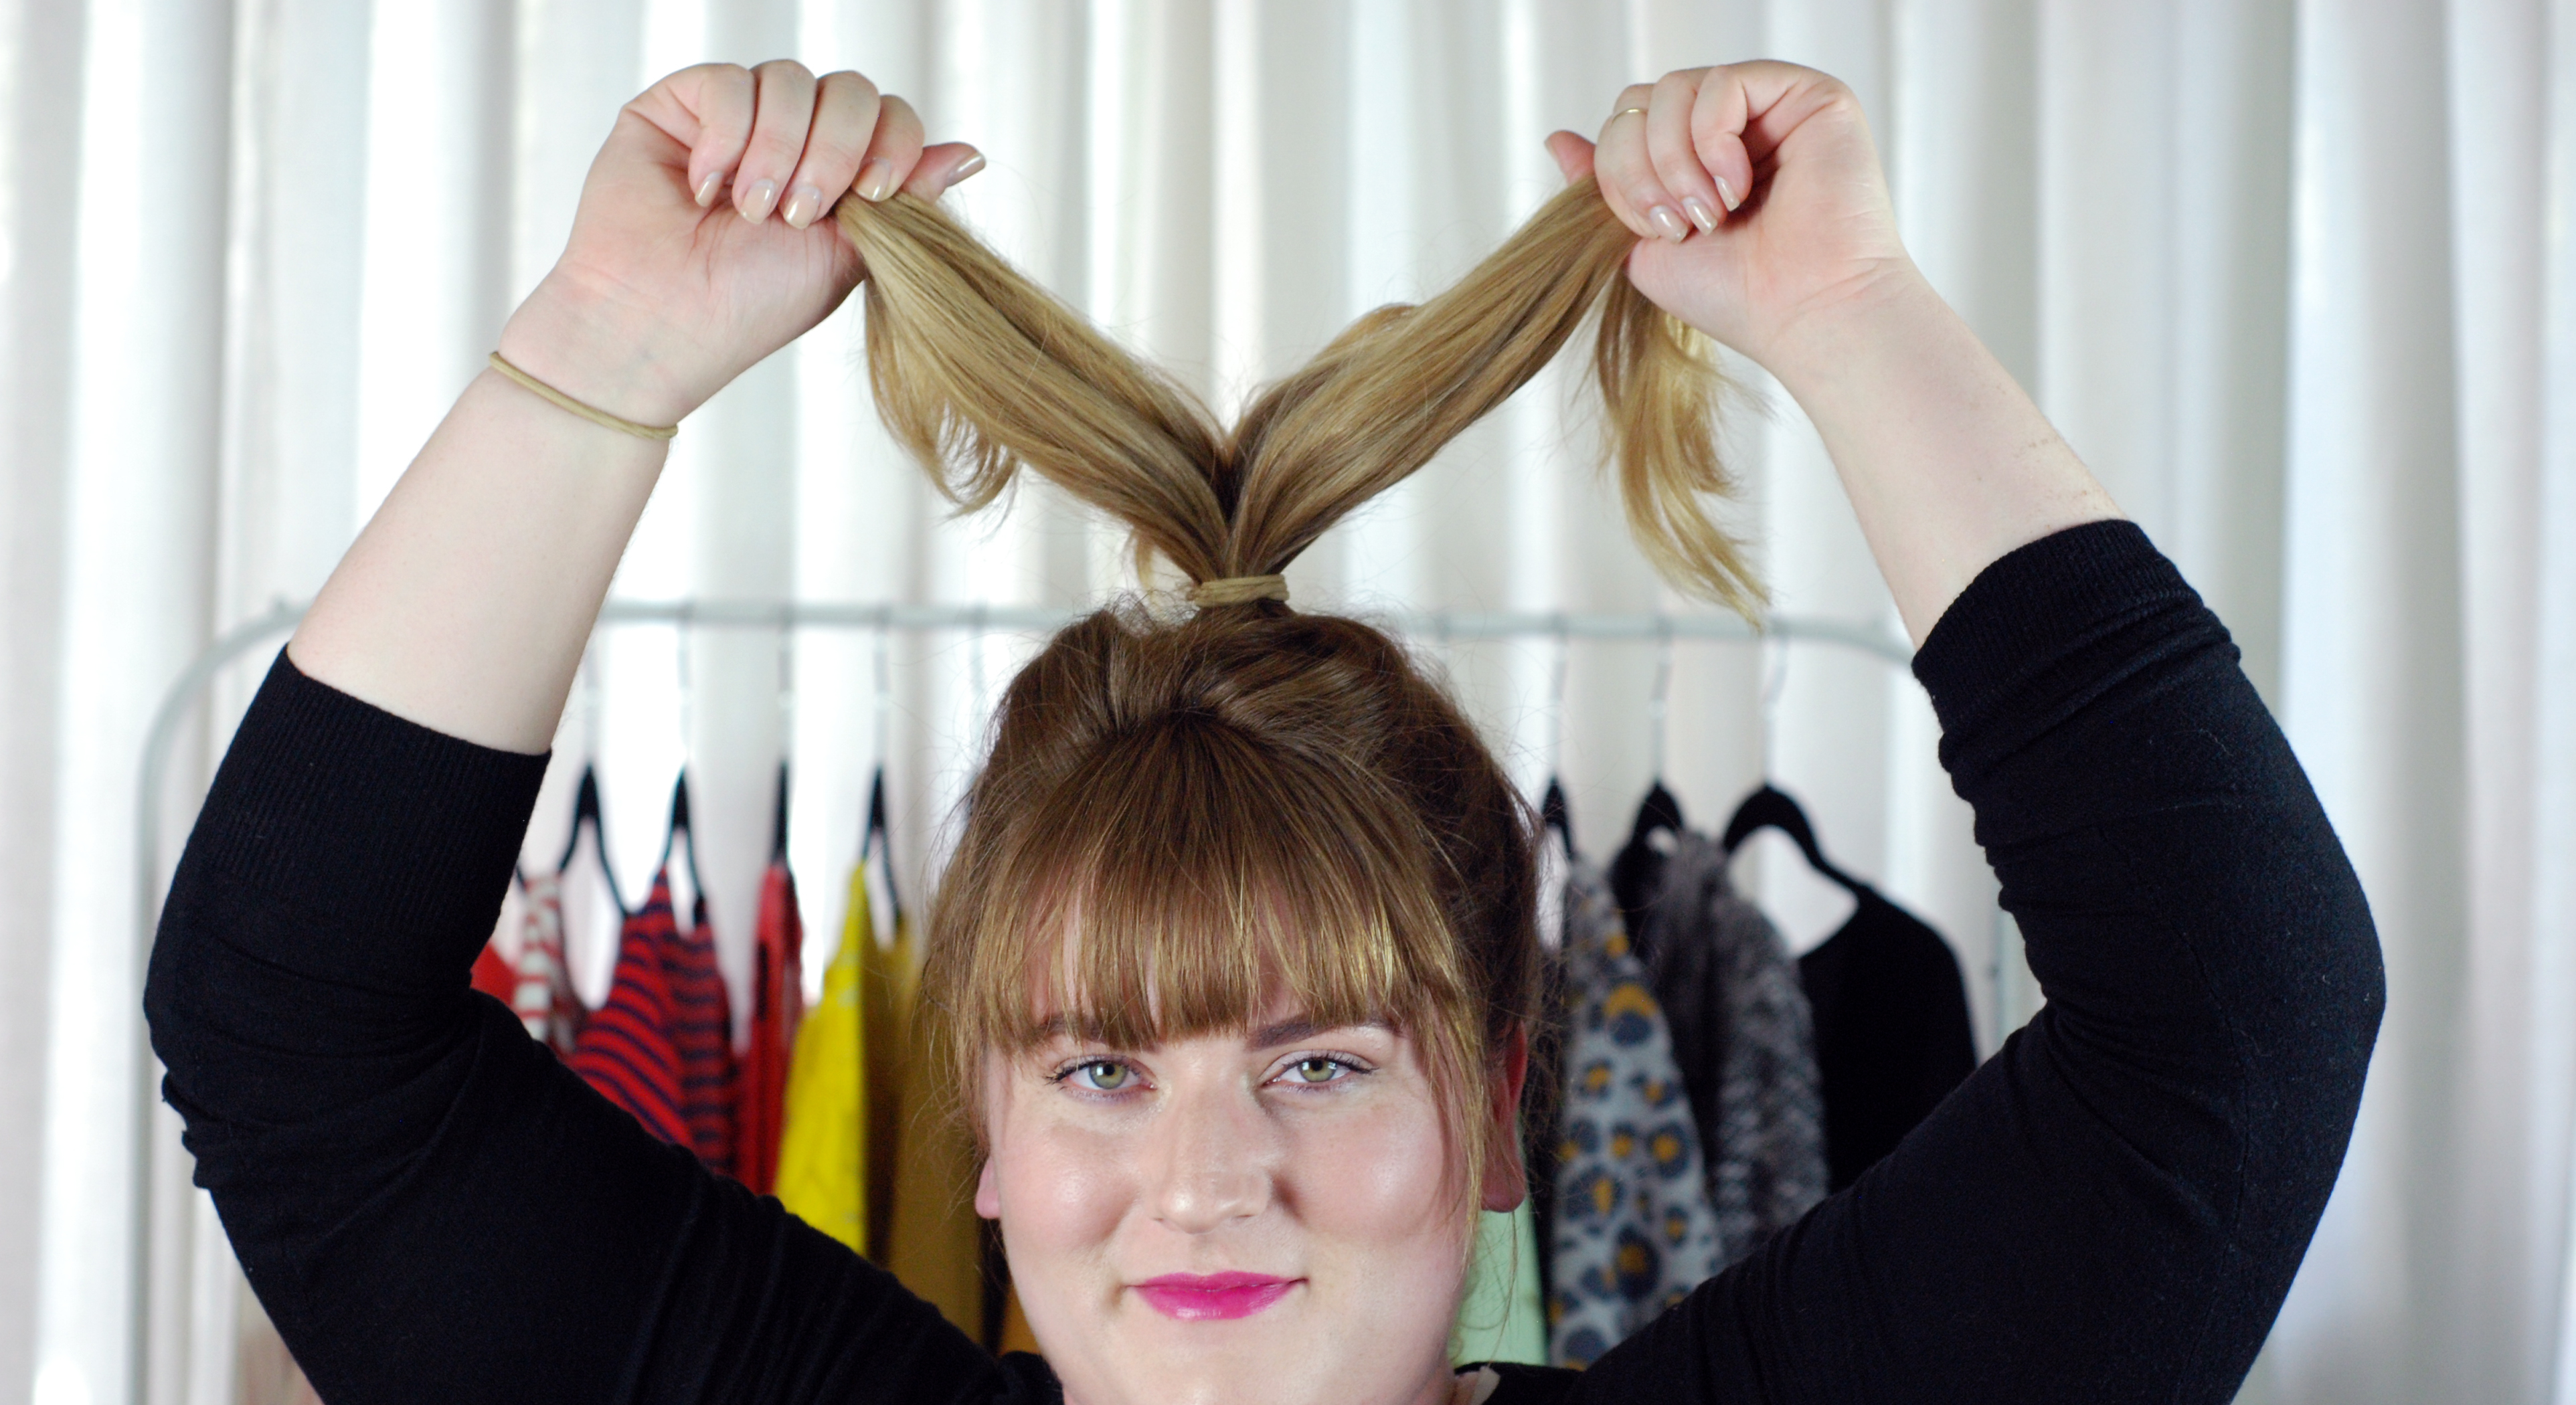
3. Split your ponytail into two even sections. Optional: if you have thin hair, tease your ponytail to make your knot fuller.
4. Make a small loop with one section of the ponytail and hold in place with your hand.

5. Using your free hand, wrap the other section of the ponytail around the loop clockwise. Continue wrapping until you get to the ends, and then incorporate the ends of the looped hair as well.
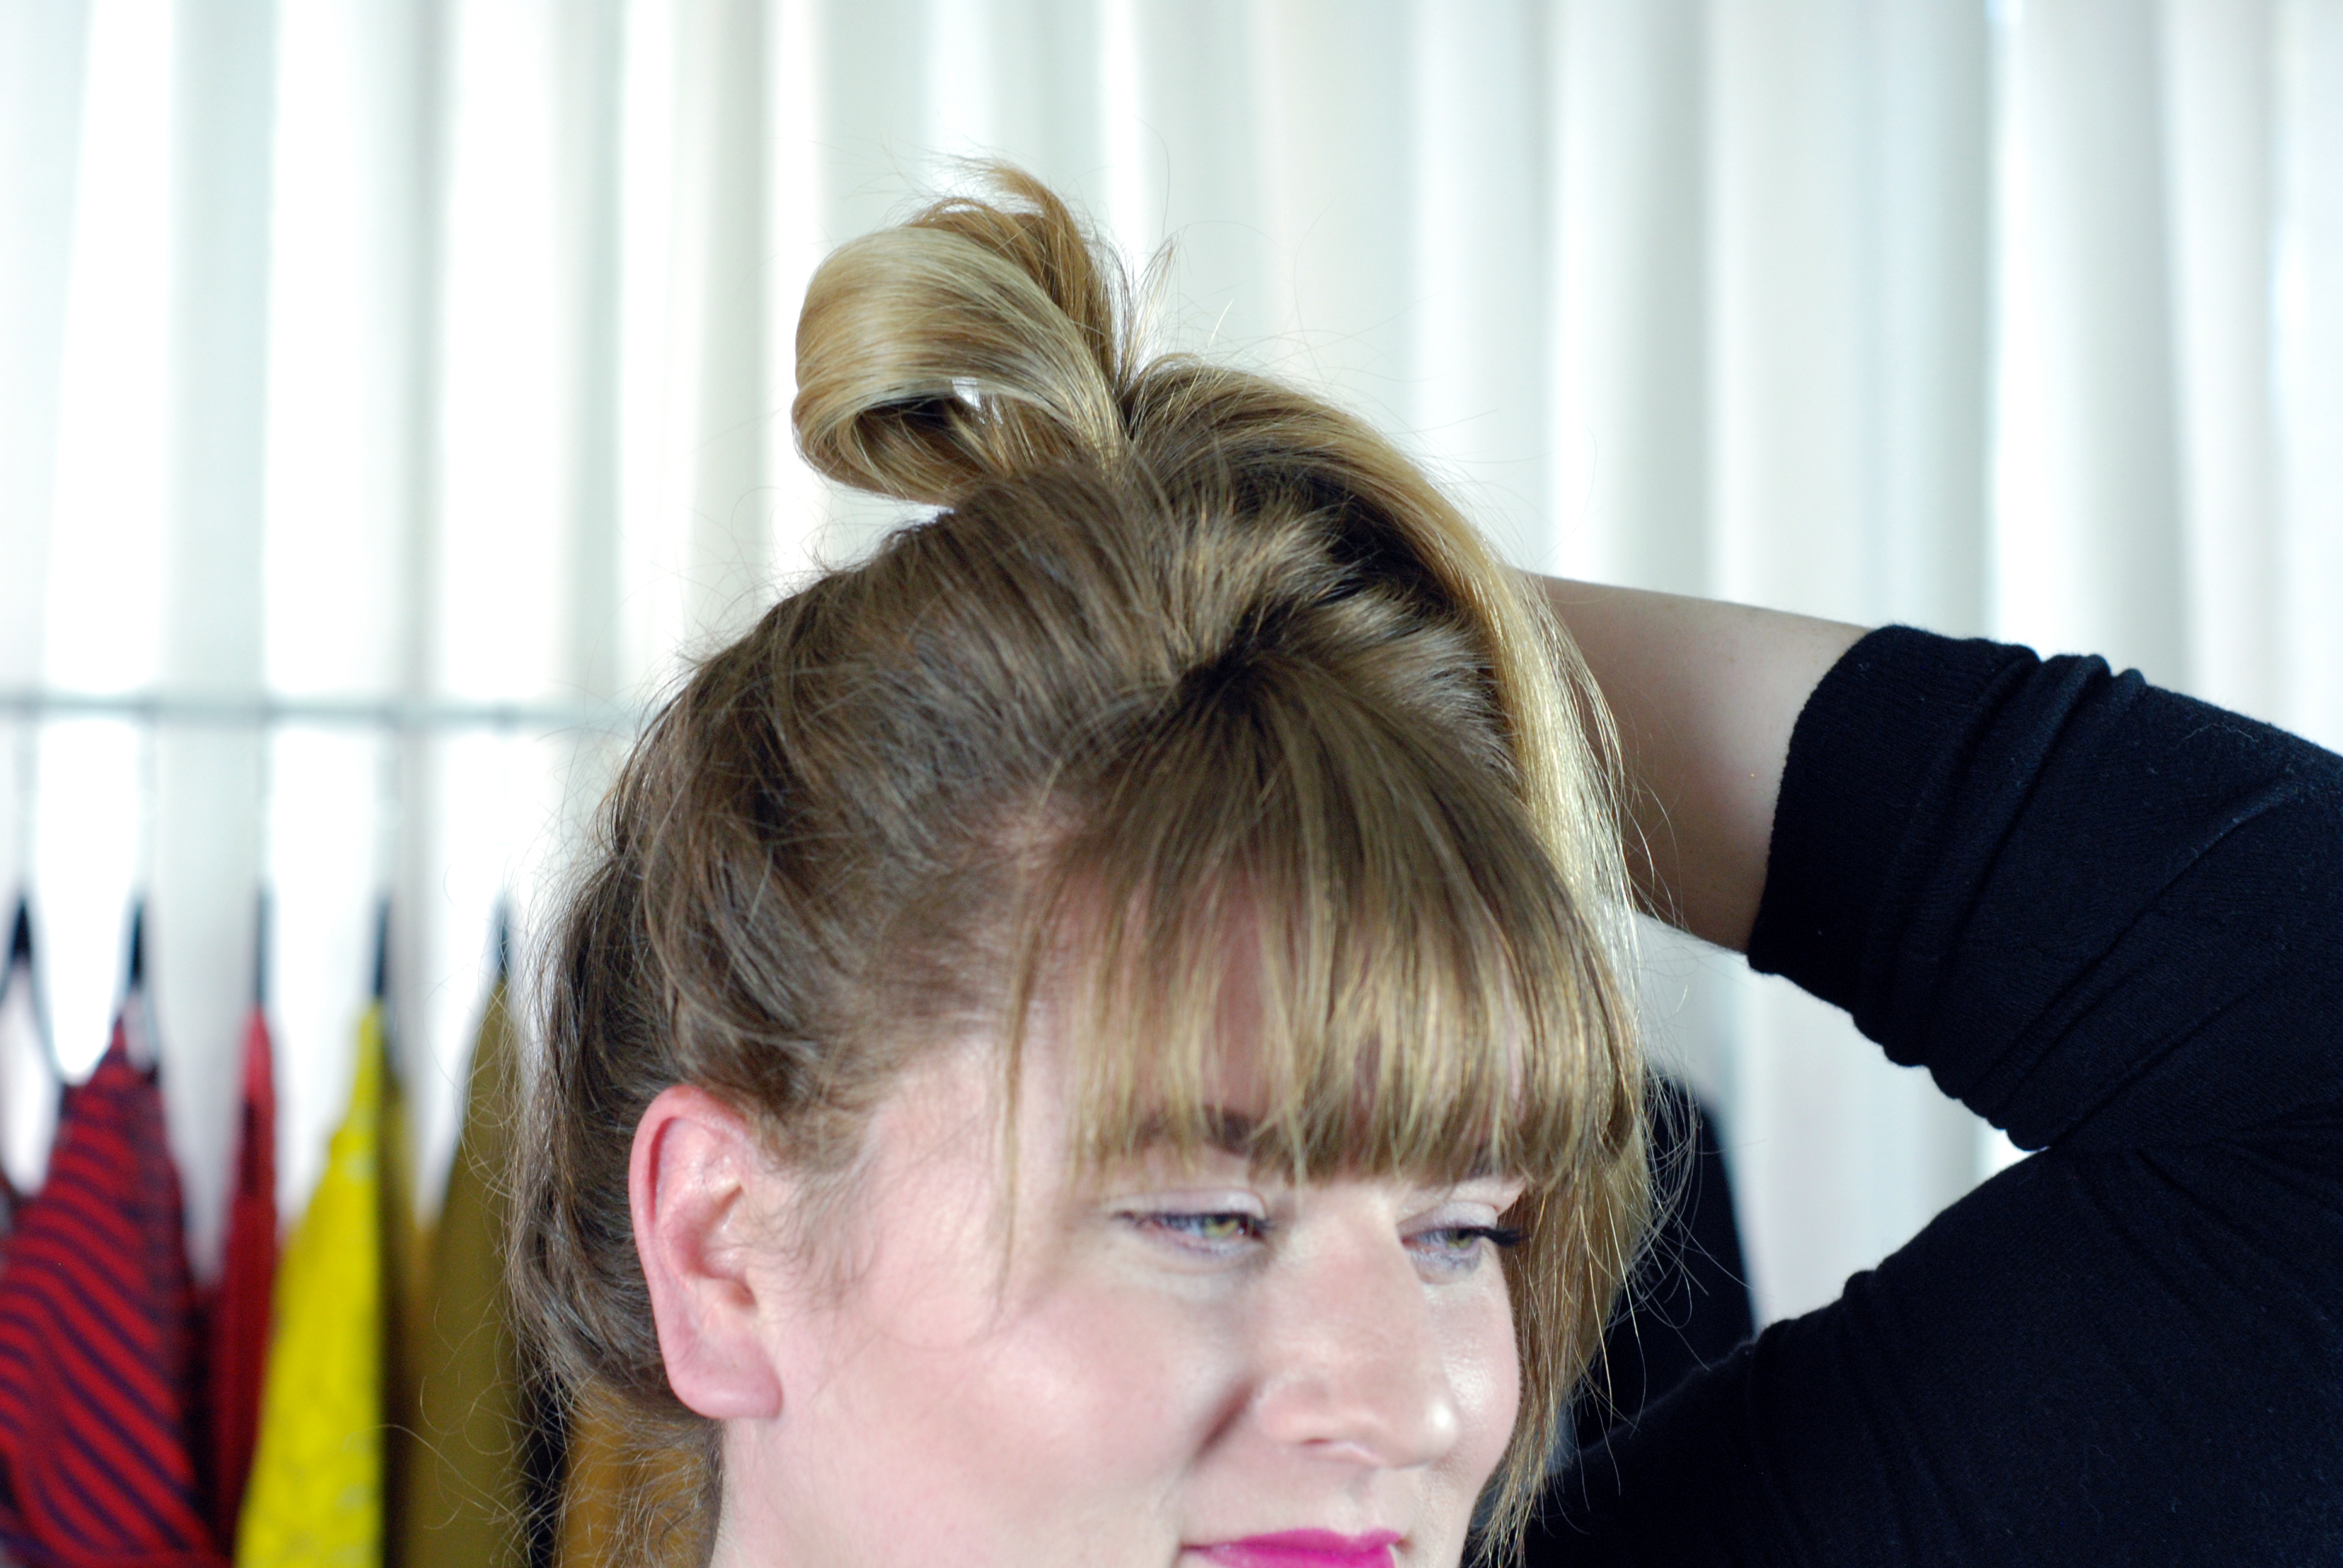
 6. Secure your knot using the other elastic.
 7. Tug with your fingers to gently loosen the knot to make it fuller.
 8. Loosen some strands along your hairline and next to your ears for an undone, wispy look.
 Voila! Top knot so on point that a prima ballerina would be jealous! ;)
XO, J
