I really hope you clicked into this article thinking “OMG no… should I be?!” after reading the title, because this post is for you. Sleeping on a silk pillowcase is something that every person should experience. From softer, healthier hair to clearer skin, there are so many benefits to sleeping on silk. What what are you waiting for?
Tell me more.
Sleeping on silk does incredible things for your hair. I’ve been sleeping on a silk pillowcase (this one, if you’re curious) for about 6 months and have definitely noticed a difference in the shininess and softness of my hair. Gone are my Medusa mornings – I now wake up to healthy, bouncy waves and I’m not kidding. Silk reduces the amount of friction on your hair as you toss and turn throughout the night, so you wake up to less breakage, dullness, and frizziness.
Sleeping on silk does incredible things for your skin. We spend 8 hours a night with our faces pressed against a pillow. Sleep wrinkles are real and they’re coming for ya. Silk helps the delicate facial skin retain its moisture. Unlike cotton (an absorbent fiber that draws moisture), silk will not absorb natural moisture from your face (and hair!). I’ve been waking up to healthier, more luminous-looking skin, and I know it’s not just to the credit of my skincare regimen.
Your pillow is always on the cool side. Silk is a natural heat regulator that helps maintain the correct body temperature, and doesn’t conduct heat or static electricity like other fibers (looking at you, cotton). It will keep you refreshingly cool in the summer and perfectly warm in the winter. No need to flip to the cool side of the pillow anymore!
It straight up feels luxurious. There, I said it. Sleeping on a silk pillowcase will make you feel like an Egyptian queen. Is there anything more fabulous than that?
Who says blondes have more fun?! They’re too busy to have fun because they’re constantly taking care of their hair! Newly blonded, I’m here with my start-to-finish hair routine! With my new, lightened locks, I have to be cognizant of how often I’m washing it, staying away from hot tools, and making sure it gets enough moisture to stay silky smooth.
Armed with the right tools and products, I’ve found a routine that works for my hair; a leave-in conditioner that adds just the right amount of moisture, a heat protectant that doesn’t weigh it down, and a blow dry creme that keeps every coil of frizz away. Since I only wash my hair about twice a week, I can ride this wash, blowout, and style for days!
Happy Monday! I’m just popping in to say hello and share this fun little beachy waves tutorial with you gals! My favorite tool that I use to create beachy waves is… can you guess? A flatiron! This may sound unusual to some of you, but I assure you that a flatiron is the best way to achieve those enviable S-shaped waves that never seem to come out right with a curling iron. The GHD 1-inch Styler has a beveled edge, which means flawless beachy waves are finally attainable! Combine that with my favorite hairspray + sea salt spray combo and you’ve got a recipe that can’t fail!
Pro tip:
Try perfecting the wrist movement before you turn on your flatiron, as it can be a little tricky at first and we don’t want any scorched tresses on our hands!
For a lot of women, the thought of getting bangs brings back flashbacks of bad childhood haircuts. Luckily, bangs as an adult aren’t scary if you know how to style them! No poufy 80s bangs in sight! Apply a drop of smoothing serum (I like Kerastase Elixir Ultime) to soaking wet bangs. It’s important to blow dry your bangs when they are still extremely wet to lock in the style. Set your blow dryer to warm and attach the nozzle. Using a paddle brush, blow dry your bangs across your forehead for about a minute in each direction. Really get into the roots of your bangs to eliminate growth patterns and cowlicks.Split your bangs in half horizontally and pin back the top layer. Set the blow dryer to the hottest setting. Using a 1.75″ ceramic round brush, blow dry the bottom layer and side pieces. The closer you keep the brush to your forehead and the less curling under you do, the less volume they will have. The more you lift the bangs and the more you curl under, the more volume they will have.To eliminate the round brush puffiness, blast with high heat and smooth the bottom layer with the paddle brush.Unpin the top layer of your bangs and repeat step 4, blow drying with high heat.Repeat step 5, blasting the top layer with high heat and smoothing with the paddle brush. Finish with a quick blast of cold air to seal the cuticle. If there are any unruly pieces, feel free to tame with a flat iron.Kinda makes you want to cut bangs again, huh?
Since my top knot has become known somewhat as my “signature” (but mostly just a reflection of my lazy girl ways), I thought it high time to put together a step-by-step how-to! My method for creating my crowning glory is somewhat unusual, so read on for the full perfect top knot tutorial!
Supplies you’ll need:
Texturizing spray (I’ve been loving this one recently)
Two thick elastics
Bobby pins (useful if you have shorter layers that slide out)
1. Start with day old (at least) hair. Spritz with a little texturizing spray and tousle with your fingers.
2. Gather your hair up into a high ponytail, and wrap the elastic securely. Pull your hair tight, and then gently loosen underneath your ponytail and the front slightly (so the hair isn’t plastered to your head).
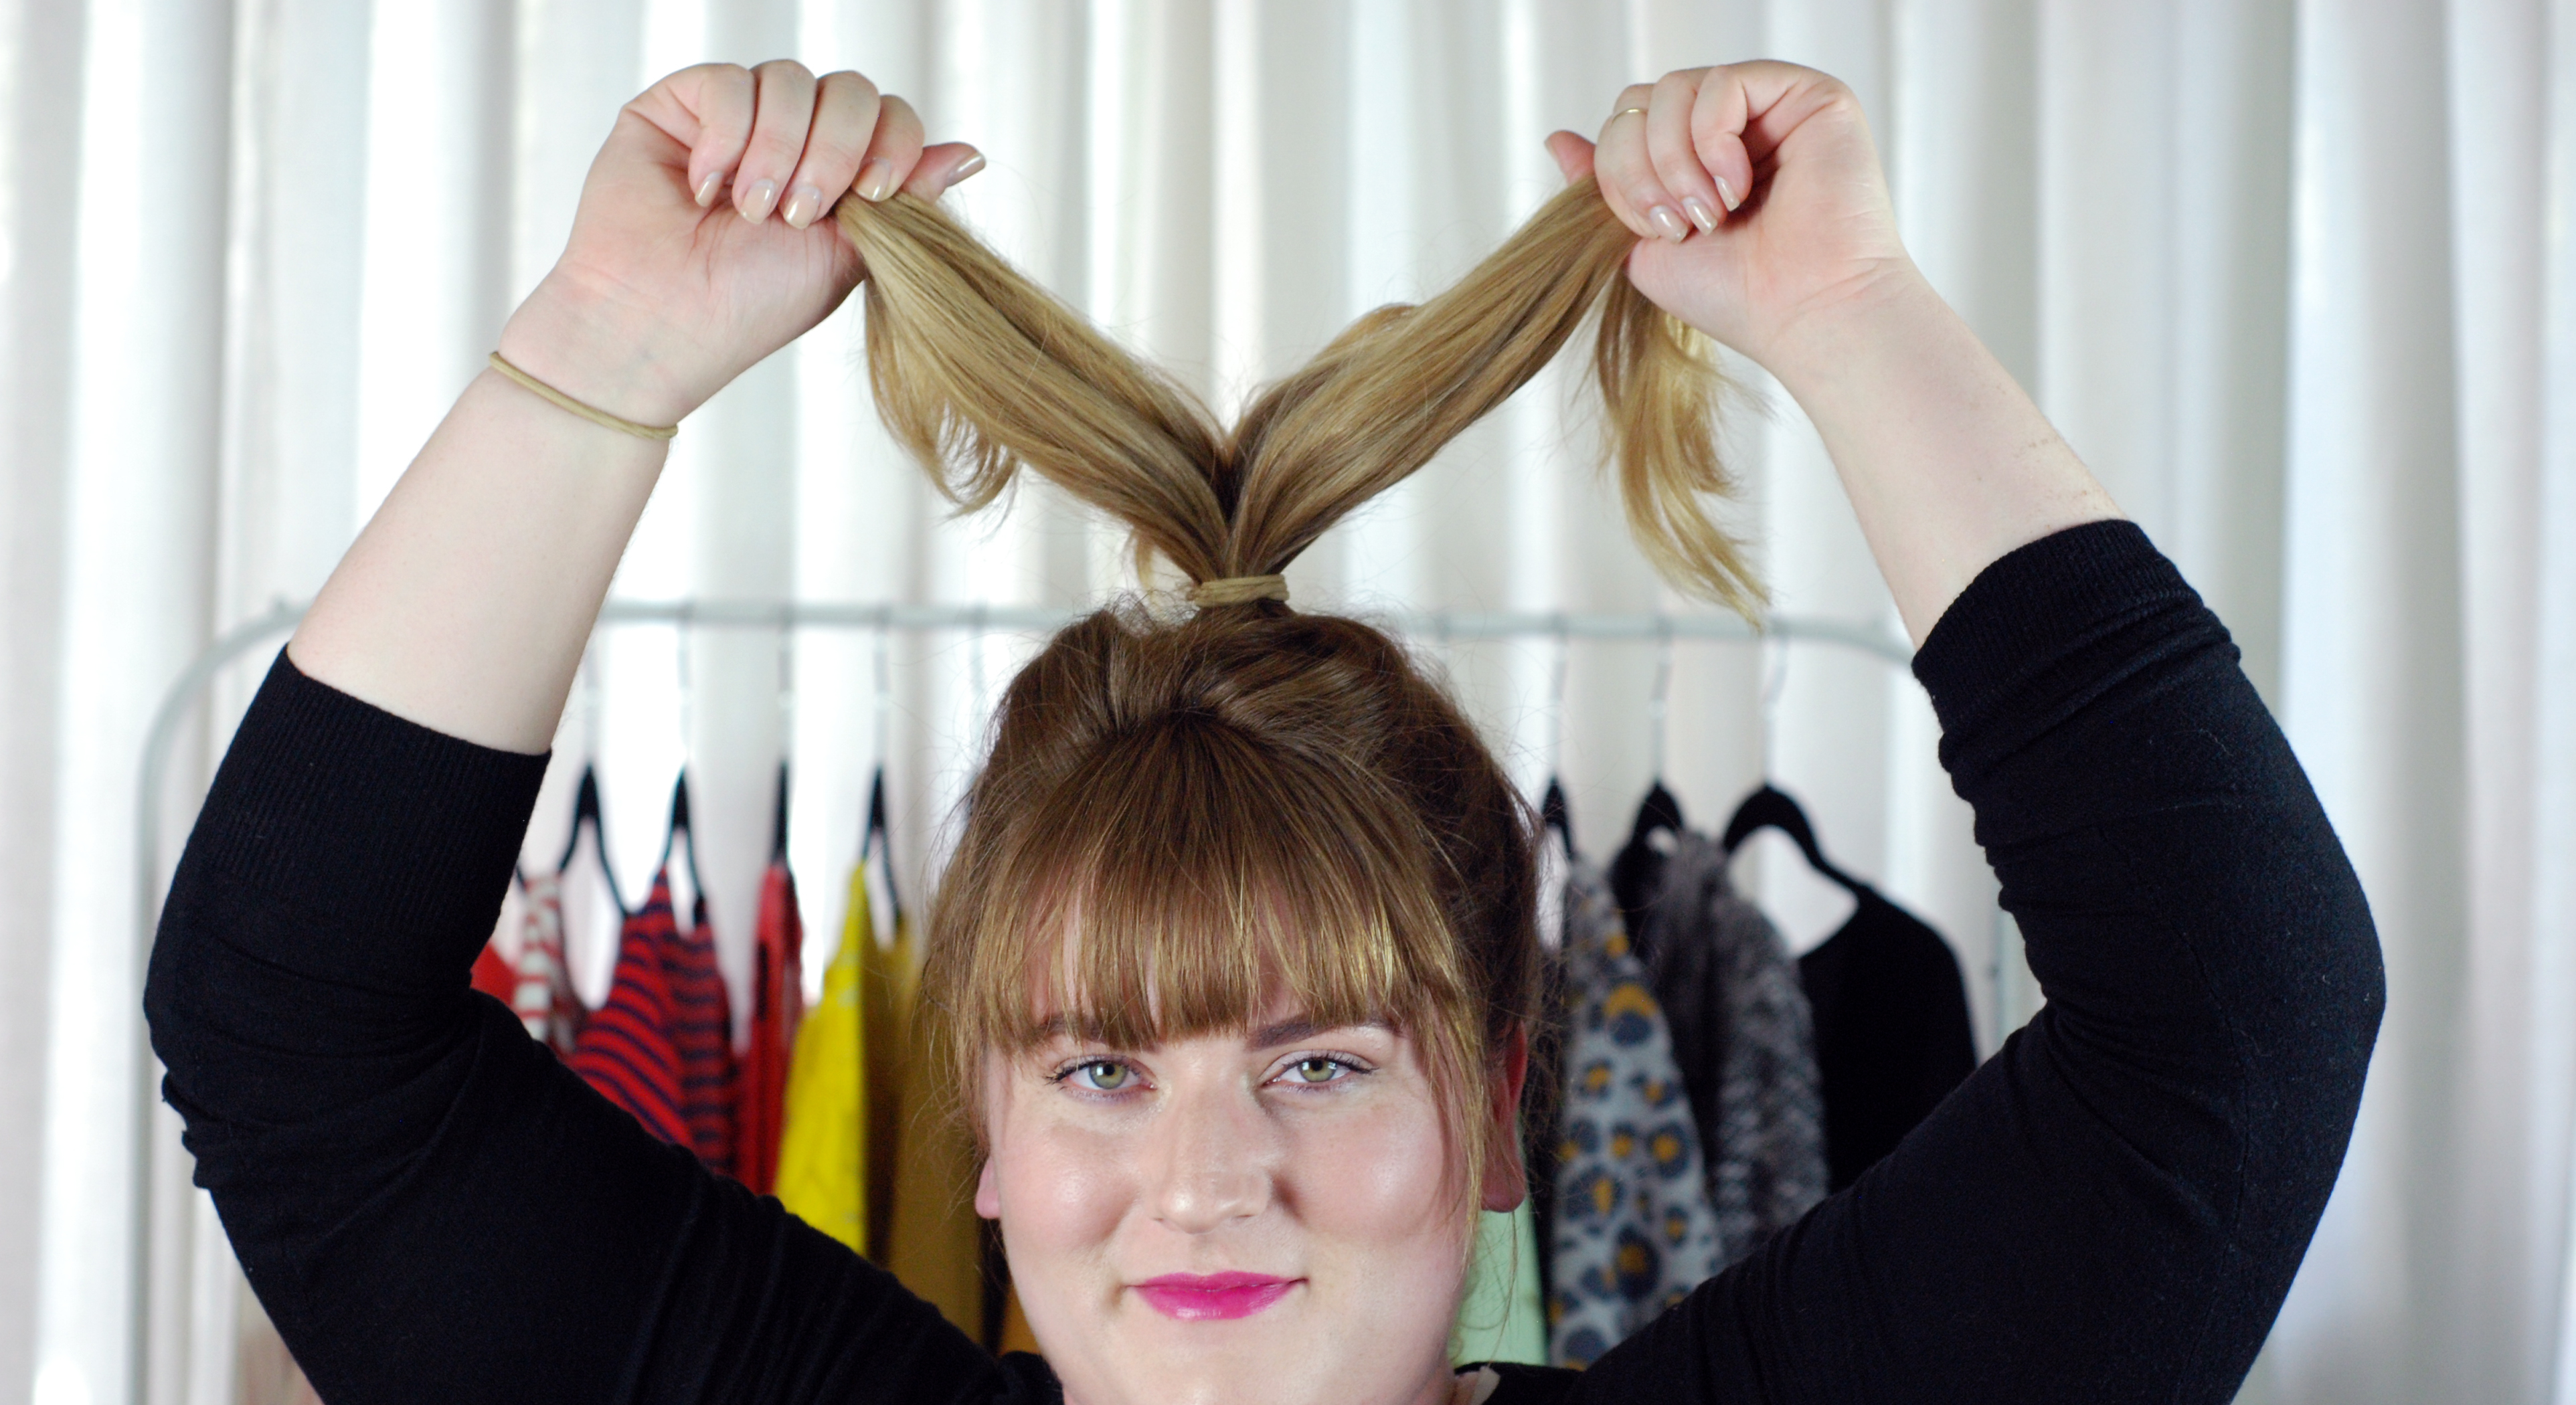
3. Split your ponytail into two even sections. Optional: if you have thin hair, tease your ponytail to make your knot fuller.
4. Make a small loop with one section of the ponytail and hold in place with your hand.
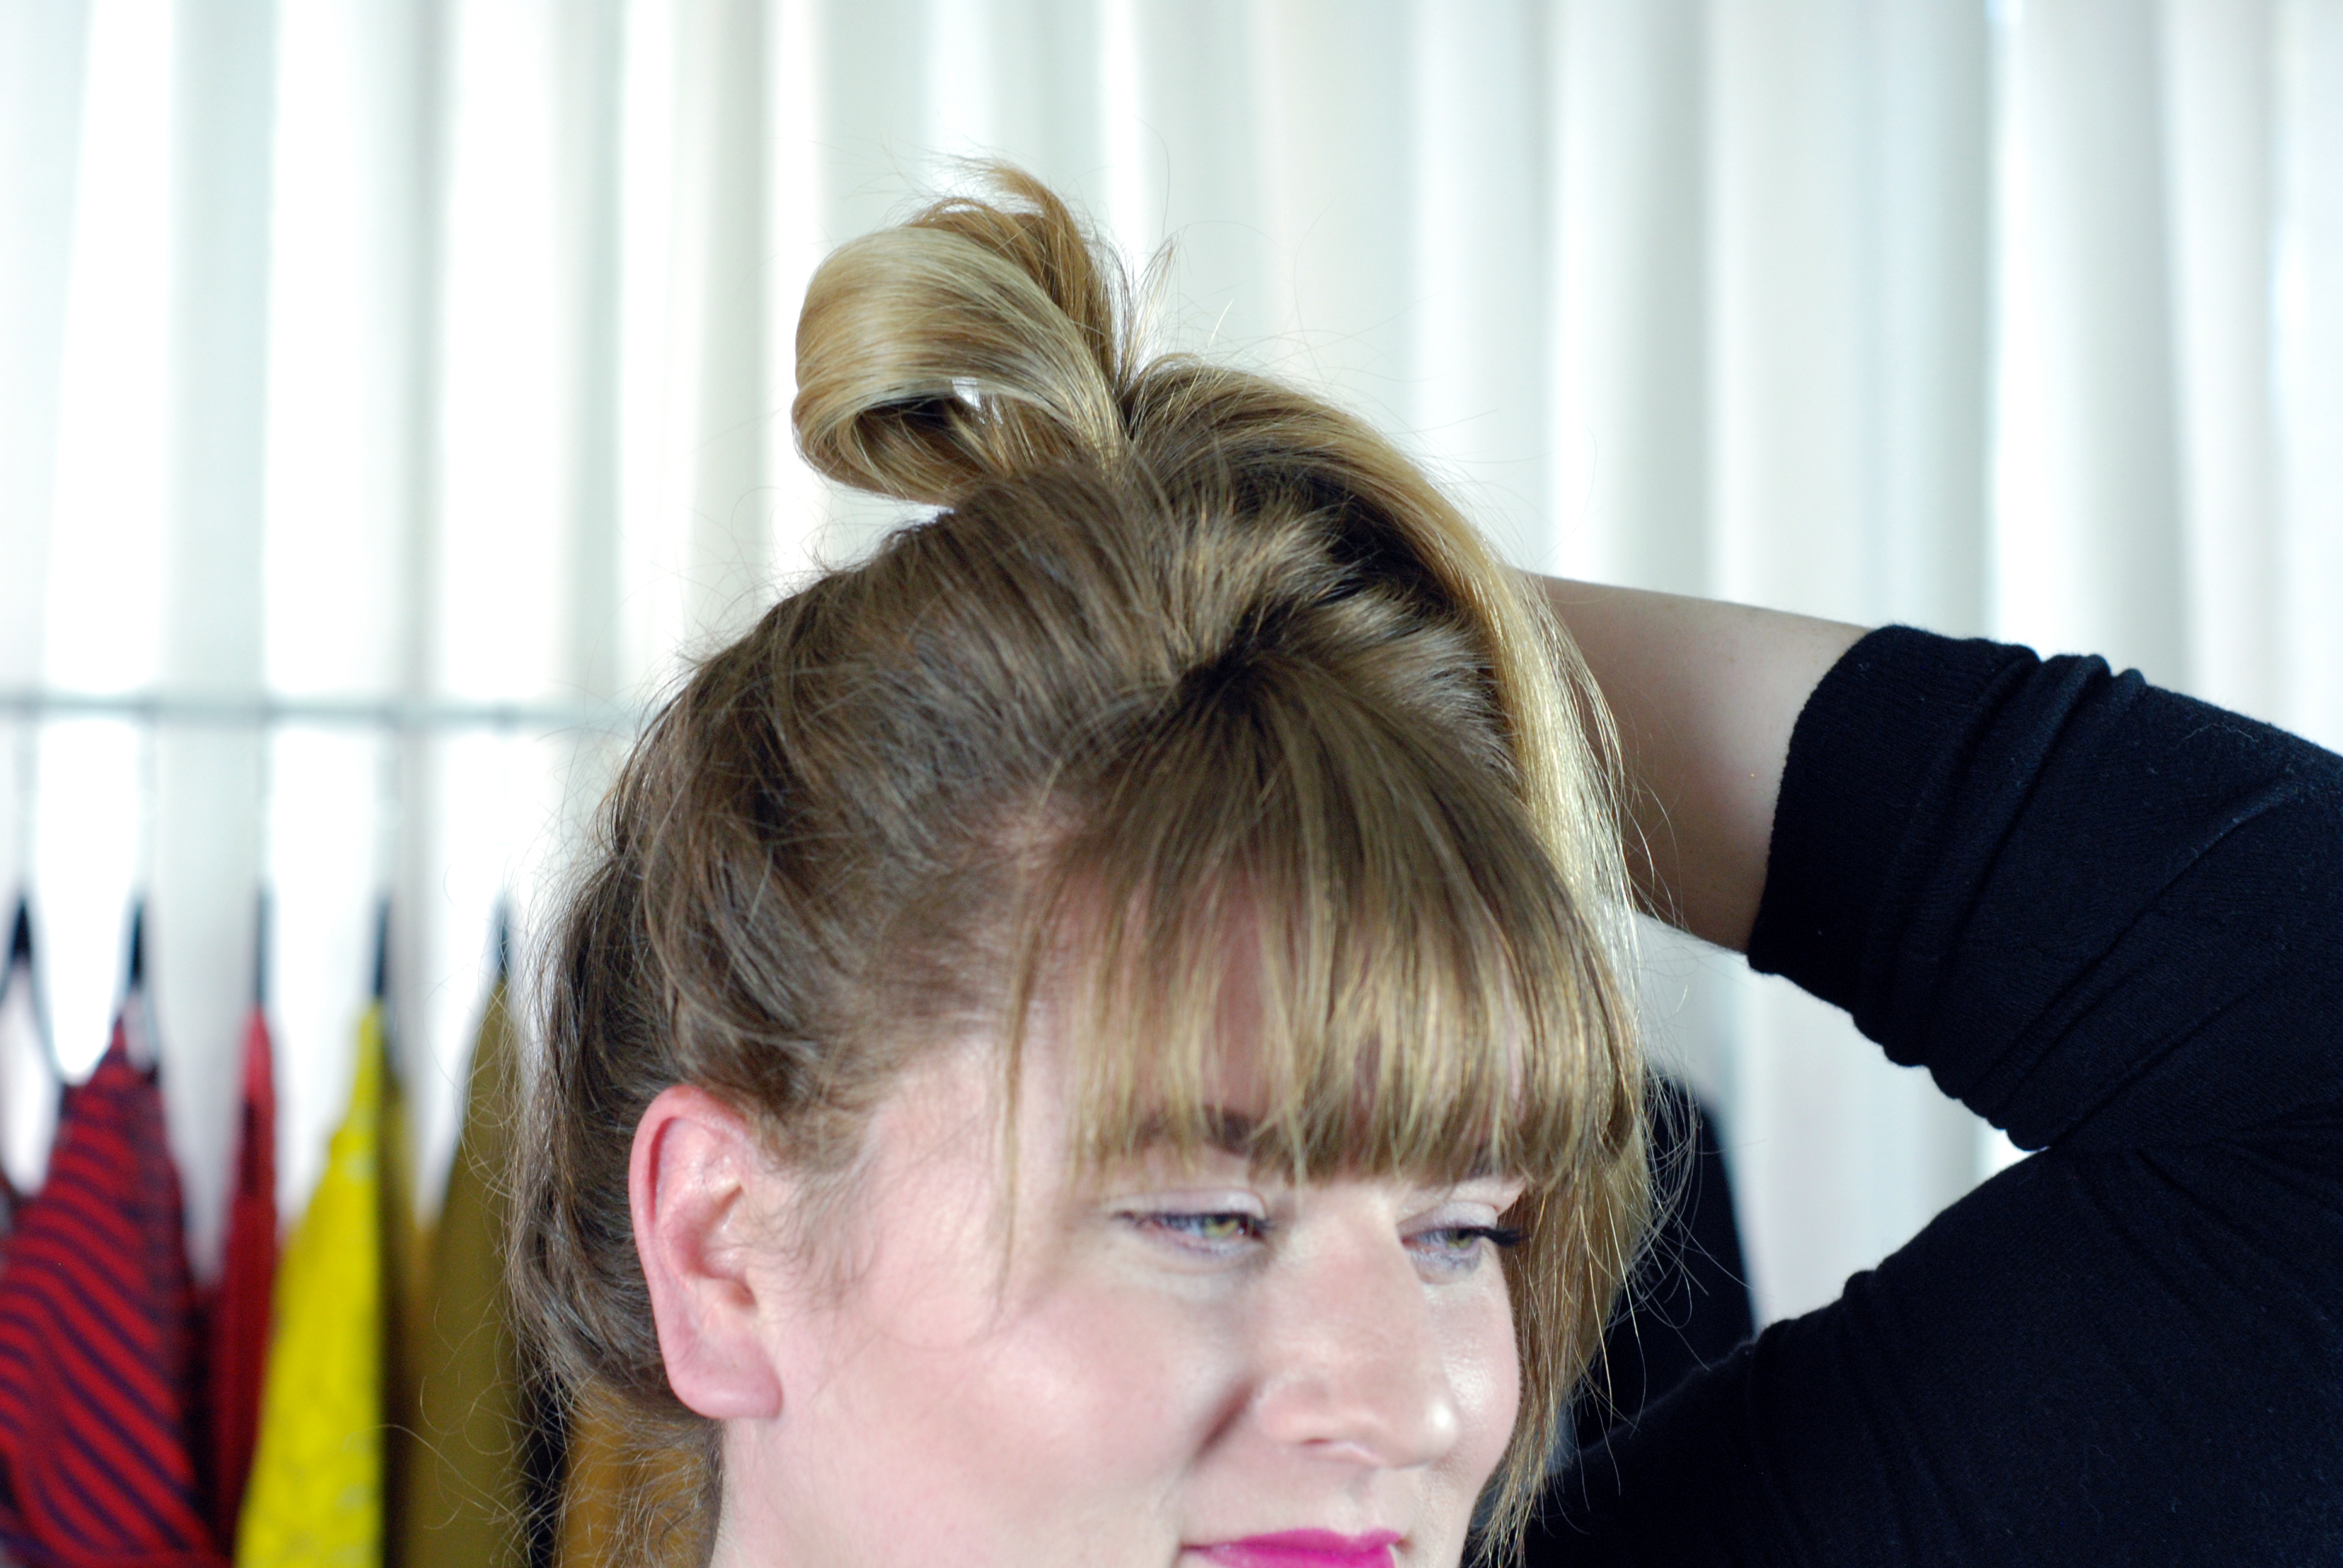
5. Using your free hand, wrap the other section of the ponytail around the loop clockwise. Continue wrapping until you get to the ends, and then incorporate the ends of the looped hair as well.
6. Secure your knot using the other elastic.
7. Tug with your fingers to gently loosen the knot to make it fuller.
8. Loosen some strands along your hairline and next to your ears for an undone, wispy look.
Voila! Top knot so on point that a prima ballerina would be jealous! ;)
As a follow-up to my last post, I thought I’d also make a list of my favorite haircare buys! This list changes more frequently than my previous one, but I wanted to share my list of current must-haves. My natural hair texture is wavy/curly and quite dry. While I try to work with my natural texture as much as I can, I’ve found that these five products (including the wash) have aided me significantly and have made my mane much more manageable. After all, a gal’s hair should be her crowning jewel!
Wen Lavender Cleansing Conditioner: I got hooked on this cleansing conditioner this summer and will probably never go back to my regular shampoo/conditioner combo again. I find it to be incredibly moisturizing and my dry hair drinks it up, but it doesn’t make my scalp oily. In fact, my scalp got so used to the moisturizing formula that when I ran out of Wen (I went back to using regular shampoo for a few weeks), my scalp broke out in extreme dry patches. The dry patches cleared right up when I went back to using Wen.
Healthy Sexy Hair Soy Tri-Wheat Leave In Conditioner: In addition to using Wen, I also spray this leave-in conditioner on my hair after getting out of the shower. Besides acting as a great detangler, this leave-in conditioner doesn’t weigh my hair down at all (like most conditioners do) and makes my blowout so shiny and reflective. It is magic.
Klorane Dry Shampoo with Oat Milk: Seeing as I only wash my hair about once a week, I’m constantly on the hunt for a great dry shampoo to prolong the life of my blowout. I’d heard so many rave reviews about this one from Klorane, but at $20 a bottle, I was hesitant to take the plunge. A few months ago, I got a travel size sample in my Ipsy Glam Bag and it was love at first spray. It doesn’t make my hair feel gritty or sticky like some other dry shampoos and smells awesome.
Kerastase Elixir Ultime: Kerastase Elixir Ultime is the holy grail in many a beauty blogger’s medicine cabinet. Applied pre-blowout, it penetrates the hair shaft and yields seriously soft, shiny, and frizz-free results. As you may remember from this post, I had been struggling with frizzy hair in the misty SF weather. Now that I’ve been using Elixir Ultime, there’s not a flyaway in sight. Bonus: it smells like a fabulously expensive perfume (think Dior J’Adore).
Living Proof Prime Style Extender: I’ve already posted about this product but couldn’t help myself from posting about it again. I apply Prime Style Extender generously on my damp hair after showering (including on the roots) and blow my hair out. I manage to go a good 5-6 (sometimes 7) days without washing my hair again. Some may say that’s gross, but I say it’s awesome. As someone with newly chopped bangs, I’m all about prolonging my blowout and cutting down on heat styling.
In addition to these products, my new hairdryer is a lifesaver. I like to work with what I’ve got, with the help of a few favorite products, of course! ;)
 I really hope you clicked into this article thinking “OMG no… should I be?!” after reading the title, because this post is for you. Sleeping on a silk pillowcase is something that every person should experience. From softer, healthier hair to clearer skin, there are so many benefits to sleeping on silk. What what are you waiting for?